
![]() Welcome to the Create with Connie and Mary Thursday Challenge! I can scarcely believe that this is the end of September already! I have completed today’s color challenge by making a ‘life is better with friends’ card.
Welcome to the Create with Connie and Mary Thursday Challenge! I can scarcely believe that this is the end of September already! I have completed today’s color challenge by making a ‘life is better with friends’ card.
The Challenge:

The Card:
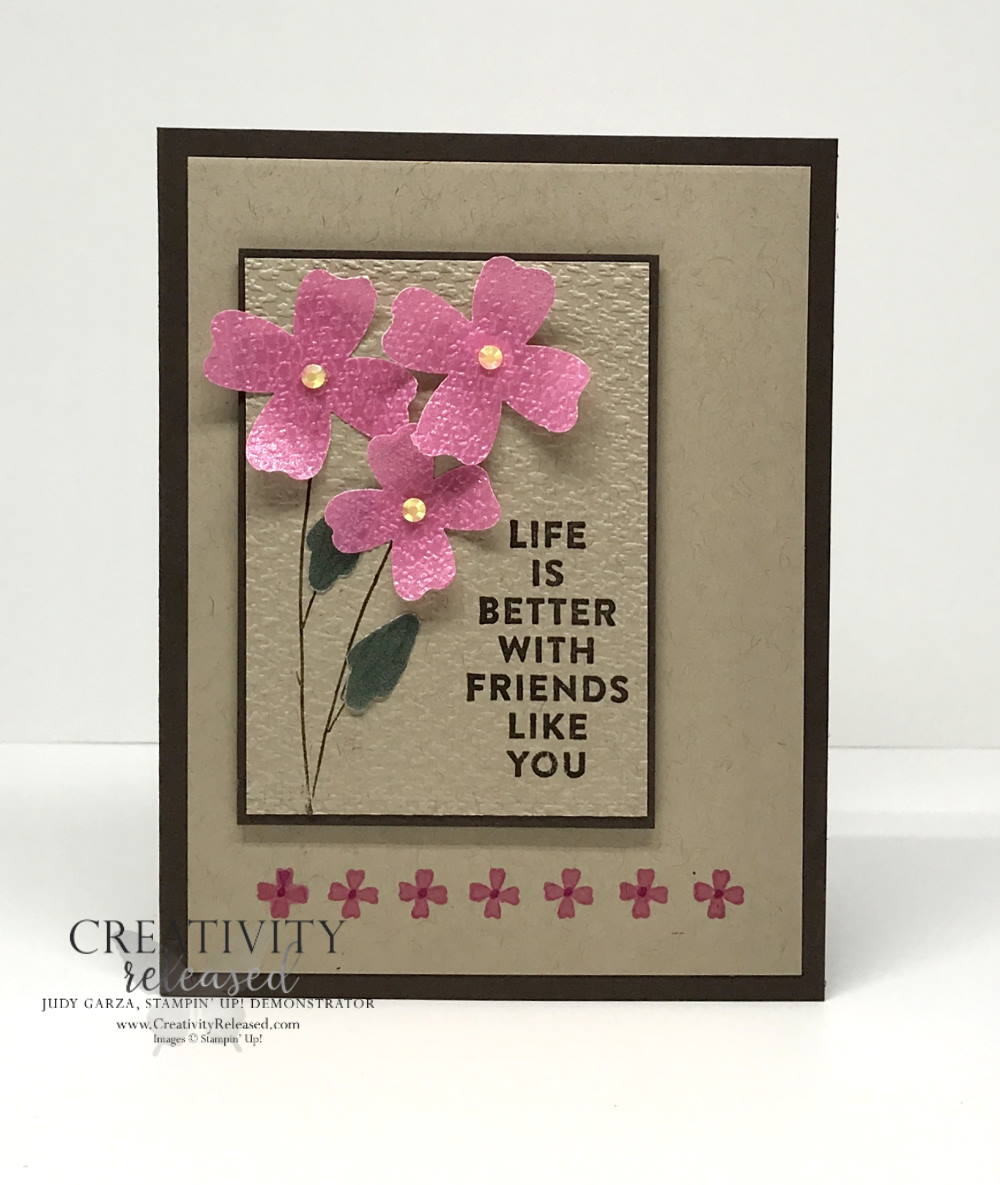 My third color choice for the challenge is Polished Pink. I want a color that will ‘POP’ when set against two neutral colors. After all, Polished Pink is a happy color to show that life is better with friends! I am using the new In Color Shimmery Vellum for the flowers. I ran the flowers through the Tasteful Textiles 3D embossing folder after punching them out. The texture enhances the sparkle of the vellum.
The Details:
 The Measurements:
- Card Base: Early Espresso Cardstock (CS) – 8 1/2″ x 5 1/2″, scored and folded at 4 1/4″.
- Layer 1: Crumb Cake CS – 3 7/8″ x 5 1/8″
- Layer 2: Early Espresso CS – 2 5/8″ x 3 5/8″
- Layer 3: Crumb Cake CS – 2 1/2″ x 3 1/2″, embossed with Tasteful Textile 3D embossing folder after stamping.
- Layer 4: Polished Pink Shimmer Vellum – 5″ x 1 1/2″, Punched with Flowers & Leaves Punch (2 large flowers, 1 small flower), embossed with Tasteful Textile 3D embossing folder.
- Optional Layer 5: Evening Evergreen Shimmer Vellum – 3″ x 1″, punched with Flowers & Leaves Punch (2 small leaves).
- Inside: Crumb Cake CS – 4″ x 5 1/4″
Tips for Assembly:
I stamped the three-flower stem using an Early Espresso Stampin’ Write Marker to add ink on the red rubber to the stem and leaves only. Then, I stamped the stem to the left side of Layer 3. I cheated by putting one of the big flowers where I wanted it on the card front to show me where to stamp the longest stem. After the stem was in place, I stamped Life Is Better With Friends with Early Espresso ink. Finally, I embossed Layers 3 & 4, as above.
If you opt not to punch Layer 5, color the leaves with any green Stampin’ Blends Marker you have. I used my finger, like in kindergarten, to smear some Multipurpose Glue on the back of the leaves I punched to adhere them over the stamped leaves.
I used Polished Pink Ink, Stampin’ Blends marker and, Stampin’ Write marker to make the row of tiny flowers along the bottom of the card. First, I stamped the strip of flowers with Polished Pink ink. Next, I colored the small flowers by gently tapping the Blends bullet tip on the flowers because Blends tend to bleed outside the lines. Finally, I used the Stampin’ Write Marker to add the dot in the center of the flowers.
Adhere Layer 1 to the card base and Layer 3 to layer 2. Dimensional Layer 2 to Layer 1, as shown.
Glue dot the two flowers on the left of the card and use a mini dimensional to adhere the right flower.
The Finishing Touch:
 I added Pale Papaya 2021-2023 In Color Jewels to the centers of the flowers as the finishing touch on the card. These jewels are so sparkly! And, yes indeed, life IS much better with friends like you! I want to encourage you to go HERE to see what the other design team members have done to meet this challenge. Have a great weekend!
Product List
")


Four for Forty - FREE TUTORIAL
Free with any $40+* purchase *before tax and shipping
I will send this FREE Tutorial via email on or around the first of the following month.
- All projects feature the One More Year stamp set 164777.
- This offer is only through me, Judy Garza.
- This free tutorial is not available for purchase.


Love the sparkle and accent in the center of the cute flowers. This is a fun card!
Thank you, Gayla! It sure is easy enough!