

Hello and welcome to another Thursday Creative Challenge with Create with Connie and Mary! Today we have this color challenge: CCMC658
 My CCMC658 Card:
 When I saw the colors, I immediately thought of flowers. A while back, I saw a card created by Donna Leonard and decided to case her layout using the day’s challenge colors.
The Measurements:
- Basic White Thick Cardstock (CS) – 11″ x 4 1/4″, scored and folded at 5 1/2″
- Basic White CS – 5 1/4″ x 4″ die-cut with the largest Stitched Rectangle Die, 2 1/4″ square die-cut with the second smallest Stitched Shapes circle die.
- Blackberry Bliss Cardstock (CS) – 5 1/4″ x 3 7/8″
The Details:

After lightly pencil-tracing the inside of the Stitched Shapes circle in the middle of the stitched white layer, I used this as a guide to stamp the flowers. I used a sticky note to mask off the area above or below the area I wanted to stamp. Then, I used the trio of flowers from the Art Gallery to stamp at the top and bottom of the circle with Bermuda Bay ink. Next, I used Blackberry Bliss to stamp flowers from the same set on the right and left of the circle and Daffodil Delight to add the four small flowers. Using Old Olive ink, I stamped the double-leaf stamp from the Beautiful Friendship stamp set. Finally, the tiny flower from Blossoms in Bloom was added a few times using stamped-off Bermuda Bay.
If you are new to stamping, you might be wondering, “what is “stamped-off” Bermuda Bay?” Stamped-off ink is exactly that. I inked up my stamp, then stamped onto a scrap paper piece, then onto the card. This gives a lighter hue of the same color.
The Inside: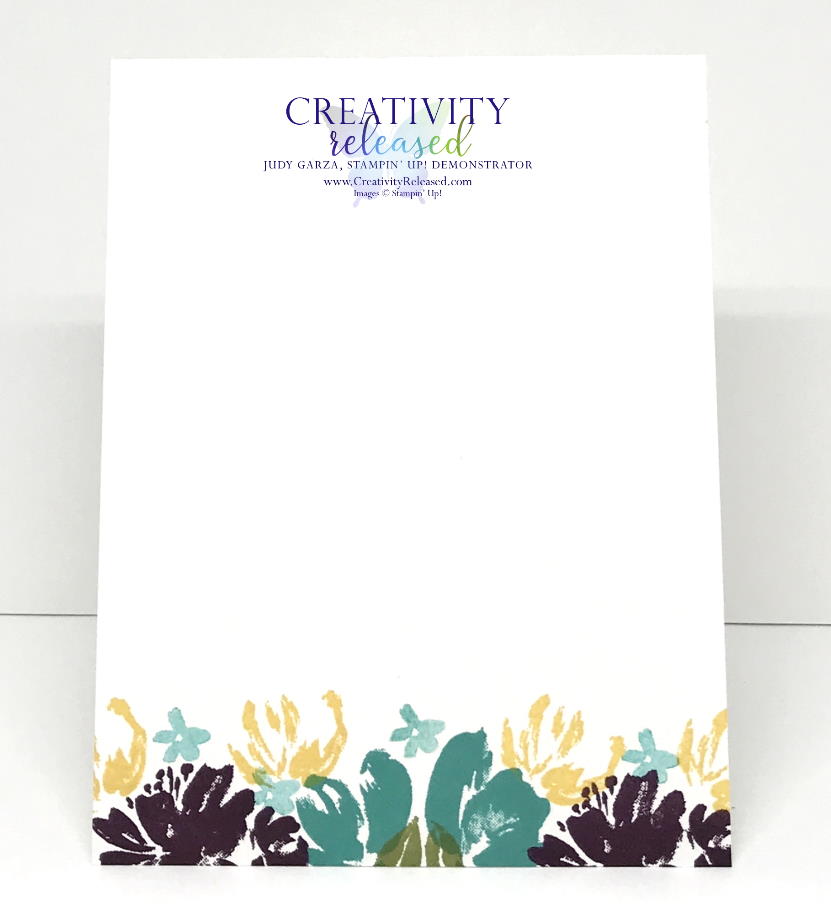
Using the same colors for the flowers on the card front, I randomly stamped the card’s inside bottom border. I love when the inside is tied together with the card front!
The Finishing Touches:

All the finishing touches were made on that small stitched circle piece of basic white cardstock. I stamped the sentiment with Blackberry Bliss and the flowers, again from Blossoms In Bloom, with Daffodil Delight ink. I placed a Rhinestone Basic Jewel in the center of each flower. The perfect finishing touch came from the new Butterfly Bijou designer series paper. I fussy-cut a butterfly from one of the patterned papers and glue-dotted it to the top of the sentiment layer. When completed, I used Dimensionals to add the piece to the center of the card.
I hope you like my card and will try it! You can try your hand at creating a card using this CCMC658 color challenge for inspiration. Don’t forget to check out the Facebook page @ facebook.com/createwithconnieandmary.
Now, you can check to see what the other stampers created for this color challenge HERE.
Product List

")


 Designer Series Paper")


 Follow me!
- To shop in my online store, click here.
- Access & view the current catalogs, Click here.
- To subscribe to those fun Paper Pumpkin kits of creativity, Click here.
- Learn about my Loyalty Rewards Program where you can earn free stamps just from shopping with me; click here.
- Follow me on Pinterest; click here.
- Click here to follow me on Facebook!
- To follow me on YouTube, Click here.
- Please subscribe to my blog, too, by adding your name and email address in the right sidebar under the Subscribe image and clicking the sign-up button.
Four for Forty - FREE TUTORIAL
Free with any $40+* purchase *before tax and shipping
I will send this FREE Tutorial via email on or around the first of the following month.
- All projects feature the One More Year stamp set 164777.
- This offer is only through me, Judy Garza.
- This free tutorial is not available for purchase.


