
![]()
Welcome to Thursday’s Challenge with Create with Connie and Mary This week, I made an Angelic Christmas card using CCMC Sketch Challenge 685
The Challenge:
 The Card:
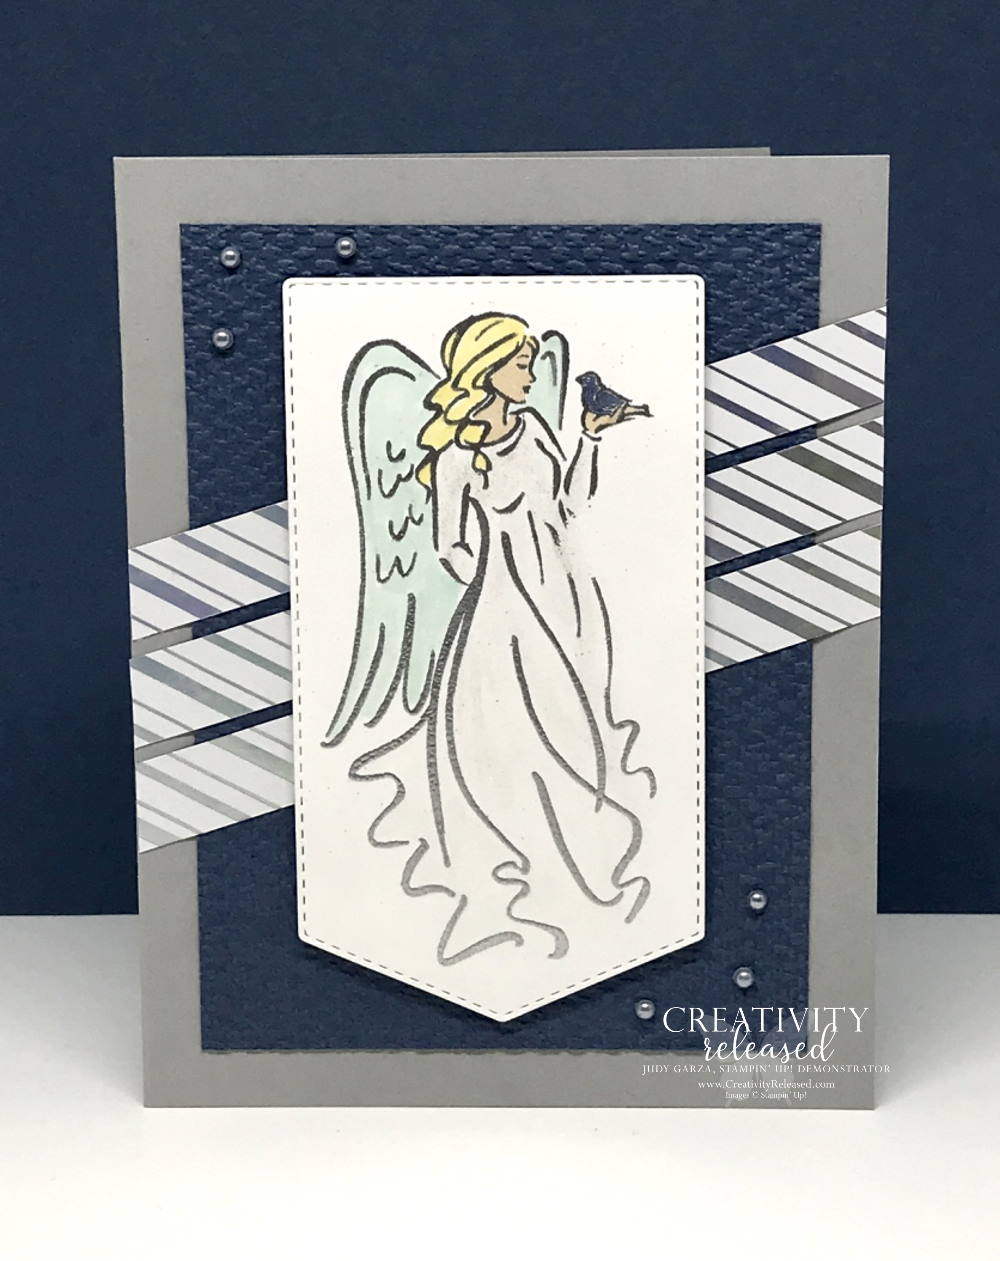 I fell in love with the Angels of Peace stamp set the first time I saw this angel. Isn’t she lovely? (Well, except the slight “oops” where a small area of the embossing powder is not all the way “cooked”) I promise to be more careful next time. I followed the sketch closely this time around. The banner is cut with a die found in the Stocking Dies. Whimsy & Wonder Specialty Designer Series Paper (DSP) provided the shiny silver foil striped diagonal accent strips. And, I added some dimension to the Misty Moonlight cardstock (CS) by embossing it with a Tasteful Textiles 3D embossing folder.
The Details:

The Measurements:
- Card Base – Smoky Slate CS – 4 1/4″ x 11″, scored and folded at 5 1/2″.
- Layer 1 – Misty Moonlight CS – 3 1/2″ x 4 3/4″, embossed with Tasteful Textile 3D embossing folder.
- Layer 2 – DSP – (3) 5 1/2″ x 1/2″.
- Layer 3 – Basic White CS – 2 3/4″ x 4 3/4″, die-cut with the banner in the Stocking dies.
- Inside Layer 1 – Misty Moonlight CS – 3 1/2 x 4 3/4″
- Inside Layer 2 – Basic White CS – 3 1/4″ x 4 1/2″
- Inside Layer 3 – DSP 3 1/4″ x 1/2″
Assembly Tips:
- Silver heat-emboss the angel image onto Layer 3. I like to stamp/emboss before die-cutting, if possible. (Learn from me. Be sure all the powder is fully cooked)
- Use the following LIGHT Stampin’ Blends Markers: Daffodil Delight for the hair; Ivory for the skin, Misty Moonlight for the bird, and Pool Party for the wings. Add plenty of Wink of Stella to the flowing gown.
- Add Layer 1 to the card base. Place the banner-cut angel in position to decide the placement of the first diagonal strip and adhere over Layer 1 and the card base. Trim off the excess from the backside.
- Use Stampin’ Dimensionals to adhere the banner over Layer 2.
- Add several Silver Metallic pearls.
- Inside, stamp the sentiments from the For Unto Us stamp set using Misty Moonlight ink on Layer 2. Add Layer 3 to the bottom of Layer 2, then to Layer 1, and, finally, to the card base’s inside.
Close up of an Angelic Image:
 I think the photo above captures the glisten of the Wink of Stella that I painted onto the gown.
The Inside:
 There you have it! I hope you like my card. Now it is time for you to click HERE to see what the other design team members have to share with you. If you do not have a current Stampin’ Up! demonstrator, I would love to earn your business. Below is a list of supplies you need if you want to recreate this card. Click on any icon to go to my online store. Thank you kindly for visiting my blog. Have a great day!
Product List
")


 Specialty Designer Series Paper")


")


Four for Forty - FREE TUTORIAL
Free with any $40+* purchase *before tax and shipping
I will send this FREE Tutorial via email on or around the first of the following month.
- All projects feature the One More Year stamp set 164777.
- This offer is only through me, Judy Garza.
- This free tutorial is not available for purchase.


