Hello, Stampers! Welcome to another day at CreativityReleased.com! I posted a card yesterday using the retiring stamp set “A Big Thank You.” Today I made a floral wreath with the same stamp set. Do you see how changing the colors and using different stamps from the same set make different cards?
The Card
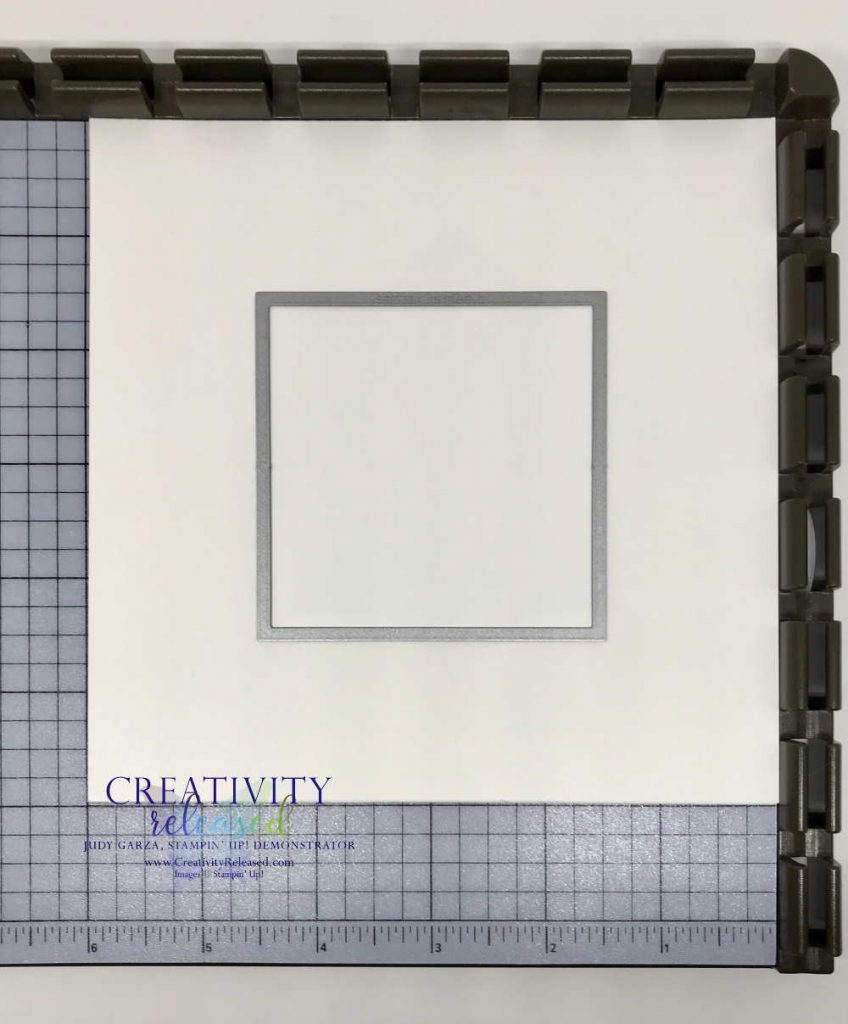
Many of you may already know how to make a wreath like this for a card. However, many may not. Therefore, I would like to show you a pictural illustration of the process. I used the Stamparatus, a positioning tool sold by Stampin’ Up!, and the Layering Squares dies to make a template.
To Make The Wreath Template
Die-cut the largest Layering Squares die from the center of a 6″ x 6″ piece of cardstock. Photo 2- Turn the die 1/4 turn and die-cut again, as shown. Be as precise as you can.
***Please note that although these photos show the paper on a Stamparatus, I cut the Layering squares with an embossing machine.
Photo 3- Place the solid flower, as shown, stamp, then turn, placing the left corner of the square into the next cut corner of the template. Stamp and repeat until a full circle is created. For the Gorgeous Grape flowers, place the first open-flower between two already stamped flowers then, follow the procedure of stamping and turning to the next corner.
I save this template in my Stamparatus storage bag, so I am ready to go when I want to make another wreath.
More Details
 The ribbon along the bottom of this card is unusual, right? I used a Granny Apple Green Stampin’ Blends Marker to color the White 1/4″ crinkled seam binding. While it was drying, I ran Snail adhesive across the bottom of the card, leaving about 1/4″ margin on each side. Beginning on the right, I adhered approximately 1/2″ of ribbon then looped some before adhering more, continuing this process across the full width of the card. Then, I went back and added a mini glue dot under each “loop” to secure it in place.
Finishing Touches
To finish the card, I added clear rhinestones to the center of each of the purple flowers. I hope you like the card and that it will inspire you to try something new in your craft room today! Thank you for looking to me for your paper crafting inspiration! Share the information with your friends. They may want to come and craft with you once everyone is comfortable getting together again.
Product List
 Follow me!
- To shop in my online store, click here.
- Access & view the current catalogs, Click here.
- To subscribe to those fun Paper Pumpkin kits of creativity, Click here.
- Learn about my Loyalty Rewards Program where you can earn free stamps just from shopping with me; click here.
- Follow me on Pinterest; click here.
- Click here to follow me on Facebook!
- To follow me on YouTube, Click here.
- Please subscribe to my blog, too, by adding your name and email address in the right sidebar under the Subscribe image and clicking the sign-up button.


